Spring cleaning is the perfect way to refresh your home. Follow these simple steps to clean and organize every room, creating a fresh space for the season.
Spring is here! As the weather becomes warmer after the dreary, cold winter or, in our case, wet winter, we prepare for warm weather activities like gardening and more time outside. However, there is one dreaded but necessary chore on the list: spring cleaning.
Spring cleaning is a tradition that allows you to refresh your home, remove accumulated dust and clutter, and make your home feel inviting and rejuvenated.
The process of spring cleaning doesn’t just improve the aesthetic of your home—it can also positively impact your health by removing allergens, germs, and dust that have built up over the colder months.
Whether you’re tackling the cleaning process over a weekend or spreading it out across a few weeks, organizing your approach will help you achieve a sparkling home with minimal stress.
This post will walk you through spring cleaning each room in your home. From the living room to the bedroom, kitchen, and bathroom, we’ll cover all the essential steps to ensure that no corner is left untouched.
1. Get Ready to Spring Clean Your Home: Preparation
Before you begin, it’s important to plan and gather your supplies. A little preparation goes a long way in making the cleaning process more efficient and less overwhelming.
Gather Your Cleaning Supplies:
Make sure you have everything you need before diving into the cleaning process. You’ll need:
- All-purpose cleaner
- Glass cleaner
- Microfiber cloths (for dusting and cleaning surfaces)
- Broom and dustpan
- Vacuum cleaner (with different attachments)
- Mop and bucket
- Sponges, scrub brushes, and scrapers
- Trash bags (and recycling bins)
- Rubber gloves
- Disinfecting wipes or sprays
- Furniture polish
- A step stool or ladder (for high places like light fixtures)
- Specialized cleaners (oven cleaner, grout cleaner, wood polish, etc.)
- Laundry baskets
Having all of these items handy will ensure that you don’t have to pause in the middle of cleaning to hunt for supplies.
Set a Schedule:
Spring cleaning can feel like a daunting task if you try to do everything at once. To make it more manageable, divide the cleaning tasks over a few days or weekends. Consider working on one or two rooms each day, or focus on one task (for example, dusting or vacuuming) across all rooms at once.
2. Declutter Each Room Before Spring Cleaning
Before you start the actual cleaning process, it’s essential to declutter each room. Head to this post to make decluttering fun and easy using a stop watch. In addition, decluttering will make cleaning much easier and help you focus on areas that need more attention, rather than being distracted by unnecessary items.
General Decluttering Tips:
- Living Room & Bedrooms: Clear off surfaces, such as coffee tables, nightstands, and dressers. Put away any clothes, books, electronics, or miscellaneous items. Move furniture to clean behind and underneath.
- Kitchen: Clear countertops of all appliances, dishes, and leftover food. Clean out the refrigerator by discarding expired food and wiping down the shelves.
- Bathroom: Remove toiletries from countertops, put towels in the laundry, and dispose of any empty or expired products in the cabinets.
- Entryway & Hallways: Pick up shoes, bags, and any other items that don’t belong in these high-traffic areas.
3. Spring Clean from Top to Bottom
The key to efficient spring cleaning is to always start at the top and work your way down. This ensures that dust and debris fall to areas you will clean last (like floors), rather than making you redo your cleaning.
Living Room and Common Areas:
- Dust the Ceiling and Light Fixtures: Start by dusting the ceiling for cobwebs and dirt. Use a duster with an extendable handle to clean light fixtures and ceiling fans. Be sure to wipe down light bulbs and replace any burnt-out ones.
- Dust Furniture and Countertops: Use a microfiber cloth to dust all surfaces, including coffee tables, bookshelves, and entertainment centers. Don’t forget hidden areas, like the tops of bookshelves and behind the TV. Clean electronics carefully with a microfiber cloth or a special cleaning wipe designed for screens.
- Clean Windows and Mirrors: Use glass cleaner to clean windows and mirrors. Spray the cleaner onto a cloth rather than directly onto the glass to avoid streaks. Don’t forget to wipe down window sills and tracks, which can gather dust and dirt.
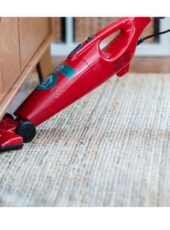
- Vacuum and Mop Floors: Vacuum carpets and rugs, paying close attention to corners and under furniture. Use the upholstery attachment for cleaning couches and chairs. For hardwood, laminate, or tile floors, sweep or vacuum first, then mop with a cleaner suitable for the floor type.
- Organize: Once the deep cleaning is done, organize the space by putting away any stray items. This will give the room a neat, inviting appearance.
Kitchen:
- Clean Appliances: Start with the refrigerator: remove all food, clean the shelves, and check for expired items. Clean the stove, oven, and microwave. You may need a specialized cleaner for the oven. For the microwave, microwave a bowl of water with a few tablespoons of vinegar to loosen any splatters inside.
- Wipe Down Cabinets and Countertops: Clean kitchen counters with an all-purpose cleaner. For stubborn spots, you can use a mix of baking soda and water to scrub away grime. Wipe down cabinet fronts with a damp cloth. For greasy buildup, use a degreaser or a vinegar solution.
- Sink and Taps: Clean the sink thoroughly. Scrub out any stains or food particles; and wipe down the faucet or tap with a disinfecting wipe or cleaner. If you have a stainless steel sink, you can polish it with a bit of olive oil or a specialized cleaner.
- Clean the Floors: Sweep the floor to remove crumbs and dust. For tile or hardwood floors, mop them using an appropriate cleaner. Pay extra attention to areas around the stove and sink, where spills tend to occur.
- Organize the Pantry: Take the time to go through your pantry. Throw away expired food, organize cans and jars, and wipe down shelves.
Bathroom:
- Clean the Loo: Scrub the toilet bowl with toilet cleaner and a brush. Wipe down the seat, lid, and base with disinfectant wipes. Don’t forget to clean the flush handle, as it can accumulate bacteria.
- Clean the Shower and Bath Tub: Scrub the tiles, grout, and shower doors with a bathroom cleaner or a mixture of baking soda and vinegar. For stubborn soap scum, use a specialized cleaner. Consider using a toothbrush to get into grout lines.
- Wipe Down the Sink and Countertop: Use a cleaner that’s safe for your countertop material to wipe down the sink, faucet, and any surrounding surfaces. Also, clean mirrors and any other glass or metal surfaces in the bathroom.
- Floors: Sweep and mop the bathroom floor using a disinfecting floor cleaner. Pay attention to corners and areas behind the loo, where dust can accumulate.
- Replace Towels and Linen: Replace any dirty towels with fresh ones. Wash bath mats and shower curtains if necessary. Consider adding a few decorative touches, like fresh soap or a new bathroom rug, to make the space feel more inviting.
Bedrooms:
- Dust and Clean Furniture: Dust all bedroom furniture, including nightstands, dressers, and any shelves. Don’t forget the headboard of the bed and any other surfaces where dust can settle.
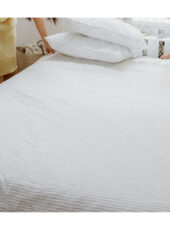
- Change the Bedding: Strip the bed and replace it with fresh sheets, blankets, and pillowcases. Consider flipping or rotating the mattress to ensure even wear. If the mattress needs cleaning, vacuum it and spot clean any stains.
- Organize the Closet: Go through your closet and donate any clothes you no longer wear. Fold or hang everything neatly, and consider adding storage bins for smaller items.
- Clean the Floors: Vacuum the floor thoroughly, paying attention to corners and under the bed. If you have hardwood or tile floors, sweep or mop them.
- Windows: Clean the windows in the bedroom the same way you did in the living room and common areas. Using a microfibre cloth and warm water, dust any blinds or shutters, and make sure the window sills are clean.
Entryway and Hallways:
Dust and Clean Surfaces: Wipe down all furniture, light fixtures, and shelves in the entryway. Use a microfiber cloth to dust corners and remove cobwebs.
Floors: Sweep and mop the floors as needed. If there’s a rug, vacuum it to eliminate dirt and debris.
Organize: Take a moment to arrange shoes, coats, and bags. If you have a coat closet, straighten it by folding or hanging coats and removing items that no longer belong.
4. Finishing Touches: Freshen Up the House
With your home now thoroughly cleaned, it’s time to add the finishing touches. These small details can help create a refreshed and inviting atmosphere:
Air Fresheners: Set the mood with essential oils, scented candles, or air fresheners to fill your home with a pleasant fragrance.
Organize Drawers: Take a moment to straighten up any drawers, bins, or baskets that may have gotten messy during the cleaning.
Add Decor: Spring is the ideal time to refresh your décor. Bring in fresh flowers, new throw pillows, or vibrant artwork to give the space a lively, updated feel.
5. Keep the Cleanliness Up
Spring cleaning doesn’t have to be a one-time task. By maintaining a tidy home throughout the year, you can minimize the need for deep cleaning sessions. Regular dusting, vacuuming, and organizing will help preserve the freshness of your space and prevent it from becoming overwhelming.
Tips for Maintaining Cleanliness:
- Daily Tasks: Wipe down kitchen counters and tidy up common areas.
- Weekly Tasks: Dust and vacuum throughout the house, clean bathrooms, and take out the trash. Use our 12 vacuuming hacks to make hoovering a breeze.
- Monthly Tasks: Deep clean appliances, wash windows, and clean behind furniture.

Ready to Spring Clean?
Spring cleaning may seem overwhelming, but with the right preparation and a room-by-room strategy, it becomes both manageable and even enjoyable.
By decluttering, thoroughly cleaning every area, and adding those finishing touches that bring a fresh feel, you’ll have a clean and organized home ready for the season ahead.
While spring cleaning can feel like a big task, breaking it down into smaller steps—focusing on decluttering, deep cleaning, and maintenance—makes the process more achievable and rewarding.
The sense of accomplishment after refreshing your home makes it all worthwhile. Whether you complete it in one weekend or spread it over several weeks, the key is to stay organized, use the right tools, and pay attention to the details.
You will have more time to spare to browse recipes for your next meal after spending your time wisely cleaning. Why not head to our recipes here or visit us on Facebook, Pinterest and Instagram for updates on life in the countryside and beyond?
Happy cleaning!


